

Table of Contents
- DIY Hacks for Tight Calf Boots: Where to Start
- Boot Calf Measurements: Know Your Numbers First
- How to Stretch Leather Boots Around the Calf at Home
- Using a Boot Calf Stretcher: What Works and What Doesn't
- Cobbler Boot Stretching: When to Stop DIY and Hand Them Over
- Troubleshooting Zippers, Seams, and Shaft Problems
- A Fit Solution That Skips Stretching Entirely
- Conclusion: Pick the Right Fix for Your Tight Calf Boots
- Frequently Asked Questions
Last Updated: October 9, 2026
DIY Hacks for Tight Calf Boots: Where to Start
Tight calf boots are a fit problem, not a size problem. Most boots are built around one standard shaft width, so a wider calf makes the zipper stall and the leather pinch.
Most tight shafts can be fixed at home, but the fix depends on your calf measurement and the material. Stretch faux leather too hard and it tears; heat real leather too fast and it cracks.
Boot Calf Measurements: Know Your Numbers First
Before you stretch anything, measure both calves and the boot itself.
Wrap a flexible tape around the widest part of your calf, usually a few inches below the knee, snug but not tight. Write down both numbers; most people are not perfectly symmetrical.
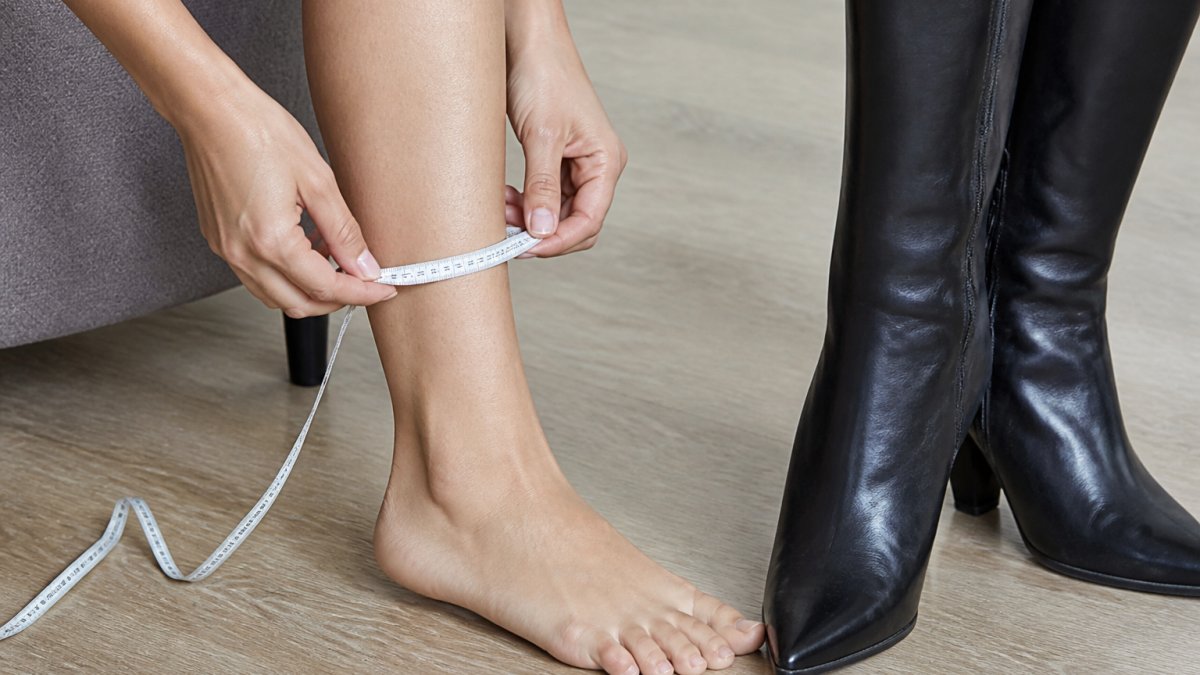
How to Measure Your Calf Circumference
Stand barefoot with your weight evenly on both feet. Measure at the fullest point of the calf, then at the boot's shaft opening, and compare.
A common mistake is measuring while seated. Your calf expands when you stand, so a seated measurement reads smaller than the real fit.
Measure the Boot, Not Just the Calf
A calf measurement alone does not tell you where the boot is tight. Measure the boot too:
- Shaft opening: lay the boot flat and measure across the top opening, then double it. This is the circumference the boot expects.
- Shaft at the widest calf point: measure across the boot at the height where your calf is fullest, then double it.
- Instep: measure around the top of the foot where the boot flexes, then double it.
Write all four boot numbers next to your calf number. The difference at each point tells you which fix applies.
Diagnose the Real Problem: Shaft, Instep, Ankle, or Zipper
The query "tight calf boots" hides four different problems. Match the symptom to the cause before touching heat or a stretcher.
- Zipper stalls at the calf and the shaft opening is smaller than your calf: this is a shaft-width problem. Stretching or a boot sleeve applies.
- Zipper closes but the top of the foot pinches: this is an instep problem. Calf stretching will not fix it; a cobbler can adjust the instep.
- Boot slides on but the ankle digs in: this is an ankle-transition problem. Break-in and targeted stretching help; shaft stretching does not.
Calf Fit Thresholds: When DIY Is Safe vs. Risky
Small gaps respond well to stretching; big gaps usually do not. Use the difference between your calf and the boot's shaft measurement to decide.

- Under 0.5 inch too tight: stretching usually works
- 0.5 to 1 inch too tight: stretching may work, but takes patience and multiple sessions
- Over 1 inch too tight: stretching rarely closes the gap; a boot sleeve or cobbler alteration is the realistic fix
Test Before You Commit: The Reversible-First Rule
Before any heat, moisture, or force, run a reversible test: wear the boot over a thin sock and stand for two minutes. If the zipper closes with light pressure and no pinching, it is a stretch candidate. If it will not close or the seam pulls, stop, no home stretching will close that gap safely, and you have lost nothing by testing first.
How to Stretch Leather Boots Around the Calf at Home
Learning how to stretch leather boots around the calf starts with heat, moisture, and slow pressure. Leather has some give, but it needs coaxing, not force.
The core method: warm the leather slightly, wear thick socks, and let body heat and movement do the work over several sessions. Never rush it with a hair dryer on high or boiling water.
Low-Risk Methods: Thick Socks, Heat, and Overnight Wear
These methods are reversible if you go slowly.
- Pull on thick wool socks, then the boots.
- Warm the shaft with a hair dryer on low, holding it a foot away.
- Flex your foot and walk for 10 to 15 minutes.
- Leave the boots on for another 20 minutes, then remove.
- Repeat daily for up to a week.
For overnight wear, stuff the shaft with rolled towels or a pool noodle; this slowly widens the leather without heat.
- Thick socks + walking: best for snug leather
- Hair dryer on low: softens stiff leather
- Overnight stuffing: gentle, steady widening
Material-Specific Rules: Leather, Suede, Faux Leather, and Vinyl
Not every material stretches the same way.
- Leather: stretches well with heat and moisture
- Suede: stretches, but heat can mat the nap
- Faux leather: limited stretch, tears easily under heat
For faux leather and vinyl, skip heat entirely: use gentle stuffing or consider a boot sleeve instead.

Using a Boot Calf Stretcher: What Works and What Doesn't
A boot calf stretcher widens the shaft with steady outward pressure. It works well on leather and poorly on synthetics.
Most stretchers use a screw mechanism to push two panels apart inside the boot. Leave it in 24 to 48 hours, check the fit, and repeat as needed.
What works:
- Leather and suede shafts
- Small, gradual widening
- Overnight, low-pressure sessions
What does not work:
MINI | Chocolate Croc Mid-Calf Boot Sleeve | XS–5X Calf Fit →
- Vinyl and most faux leather
- Gaps over an inch
- Zippers that will not close
| Method | Best Material | Time Needed | Risk Level |
|---|---|---|---|
| Thick socks + walking | Leather | 3-7 days | Low |
| Boot stretcher | Leather, suede | 24-48 hours | Low |
| Ice method | Leather only | Overnight | Medium |
| Heat + moisture | Leather | 1-2 hours | Medium |
| Cobbler stretching | Any | 2-5 days | Low |
Cobbler Boot Stretching: When to Stop DIY and Hand Them Over
Cobbler boot stretching is safest when the gap is large or the material is fragile. A cobbler has professional tools and can stretch a boot without cracking the finish.
Hand them over if:
- The zipper will not close at all
- The gap is over an inch
- The material is vinyl or thin faux leather
A cobbler can also take in excess material on boots that are too loose, which DIY methods cannot do cleanly.
Troubleshooting Zippers, Seams, and Shaft Problems
Zipper and seam issues are the most common reasons tight boots stay in the closet. A stuck zipper often means the shaft is too narrow, not that the zipper is broken, but treating a mechanical failure as a fit issue can damage the boot.
Separate the Zipper Problem from the Fit Problem
Before stretching anything, test the zipper off the foot: lay the boot flat, unzip it fully, then zip it closed with nothing inside. If it glides, the problem is shaft width; if it sticks, catches, or separates, the zipper itself needs attention.
- Zips smoothly off the foot, sticks on the foot: fit problem. Go to the shaft-width fixes above.
- Sticks off the foot too: mechanical problem. Clean and lubricate the teeth first.
- Separates after closing: the slider is worn. A cobbler can replace the slider without replacing the whole zipper.
Lubricate and Clean the Zipper
Most sticking zippers respond to cleaning and lubrication before any stretching.
- Rub a pencil (graphite) along the teeth on both sides.
- Or rub a plain white candle or a bar of soap along the teeth.
- Or use a zipper lubricant stick made for boots and jackets.
Avoid oil-based lubricants on suede and unfinished leather. They stain. On those materials, use graphite or a dry zipper stick.
Straighten a Bent Tooth Carefully
A single bent tooth can stall a zipper. Look along the track in good light.
- If you find a bent tooth, straighten it gently with small flat-nose pliers.
- Support the back of the tooth with your finger so you do not pull the track out of the tape.
- If the tooth breaks off, stop. A missing tooth means the zipper needs replacement, and only a cobbler should do that.
Shaft Seams and Stitching
A seam that pulls or splits under stretch is a stop condition, not a fix-it-yourself moment.
- Seam pulls but does not split: back off the stretch. The seam is telling you the leather has reached its limit.
- Seam splits at the calf: stop all DIY. A cobbler can restitch it, but continuing to stretch will tear the lining too.
- Decorative stitching pops: stop. Decorative stitching is often weaker than structural stitching and cannot be re-created at home.
Material-Specific Zipper and Seam Risks
- Leather: forgiving. Seams can be restitched, and small pulls often relax with wear.
- Suede: the nap hides small seam pulls, but heat can mat the nap and make the damage permanent.
- Faux leather: seams tear rather than stretch. Once a faux-leather seam splits, it usually cannot be invisibly repaired.
When to Stop and Call a Cobbler
Hand the boot over if any of these apply:
- The zipper separates after closing (worn slider)
- A tooth is missing or broken
- A structural seam has split
A cobbler can replace a slider, restitch a seam, or rebuild a gusset. None are safe DIY fixes, and attempting them usually costs more than the original repair.
A Fit Solution That Skips Stretching Entirely
Sometimes the smartest fix is not stretching at all. If your calf runs well outside standard boot sizing, a boot sleeve gives you the look without the fight.
Bootsy makes a patent-pending boot sleeve that turns your existing heels and some flats into boots.
The MINI Chocolate Croc Mid-Calf Boot Sleeve works for XS to 5X calf fit and pairs with women's dress shoes and heels.
If you want a taller look, the CROC Chocolate Croc Thigh-High Boot Sleeve sizes by thigh circumference and accommodates measurements up to 60 inches.
Conclusion: Pick the Right Fix for Your Tight Calf Boots
Stretching works for small gaps in leather but fails on vinyl, big gaps, and zippers that will not close.
If your calves simply do not fit standard boot sizing, stop fighting the shaft. Bootsy boot sleeves size by your calf and thigh measurements, work with heels and some flats, and come in fits from 14 to 60 inches.
Frequently Asked Questions
Can you stretch leather boots around the calf at home?
Yes, if the leather has some give and the boot is only slightly tight. Start by measuring your calf and the boot shaft circumference. If the gap is under about half an inch, thick socks, low heat from a hairdryer, and wearing them around the house can help. For gaps over an inch, a boot calf stretcher or a cobbler is the safer route because leather can crack if you force it.
Do boot stretchers work on the calf area?
Most boot stretchers are built for the foot and ankle, not the calf. A boot calf stretcher that expands the shaft can widen tight calf boots by roughly half an inch to a full inch, depending on the leather. Spray the inside with a stretching solution, insert the stretcher, and leave it overnight. Faux leather and vinyl usually will not stretch this way and may tear instead.
How can I tell whether tight calf boots can be stretched safely?
Check three things: the material, the seam placement, and how much room you need. Full-grain leather and suede stretch well. Faux leather, vinyl, and bonded leather usually do not. If a zipper or decorative seam runs down the calf, stretching can pull it out of line. Need more than one inch of extra room? Skip DIY and see a cobbler, or use a boot sleeve that fits by calf circumference instead.
When should I take tight calf boots to a cobbler?
Go to a cobbler when the boots are leather, the fit is more than one inch too tight, or the zipper will not close at all. Cobbler boot stretching uses professional tools that widen the shaft evenly without cracking the leather. Bring your calf measurements so the cobbler knows the target size.
0 comments