

Table of Contents
- What You'll Need to Make Heels Look Like Boots
- How to Make DIY Boot Covers: Step-by-Step
- Choosing the Right Fabric for Boot Covers
- Boot Sleeves for Heels: The Ready-Made Alternative
- Professional Finishing, Durability, and Maintenance
- How to Style Boot Covers for Any Occasion
- Common Mistakes to Avoid When Making Heels Look Like Boots
- Conclusion
Last Updated: August 16, 2026
What You'll Need to Make Heels Look Like Boots
The fastest way to make heels look like boots is with a well-fitted boot cover. At Bootsy - The Boot Sleeve, we've helped women transform their existing heels into polished, boot-like silhouettes. DIY boot covers work by wrapping the lower leg in a close-fitting fabric sleeve that bridges the gap between the top of your shoe and your calf or thigh. The key is choosing materials that stretch enough to stay smooth, hold their shape through a full day of wear, and attach securely so they don't slip. According to the Craft Industry Alliance's fabric sourcing guidance, stretch fabrics with four-way stretch are the most forgiving for custom fit projects because they accommodate leg shape variations without bunching.
Sewing Method Materials
For a sewn boot cover, gather:
- Stretch fabric (spandex, faux leather, or stretch vinyl), at least half a yard for a mid-calf cover, a full yard for thigh-high
- Measuring tape and fabric chalk or washable marker
- Sharp fabric scissors
- A sewing machine with a stretch needle (ballpoint, size 75/11 or 90/14)
- Elastic band, 1-inch width, for the top hem
- Thread matched to your fabric color
Faux leather and stretch vinyl give the most convincing boot silhouette but don't breathe. For covers worn longer than a few hours, stretch ponte or heavy-weight spandex is more comfortable and still reads as footwear from a distance.
No-Sew Method Materials
The no-sew approach is ideal for last-minute costume needs or anyone without a sewing machine.
- Stretch fabric (spandex or stretch knit works best)
- Fabric adhesive or fabric fusion tape (heat-activated tape is more durable than cold-press)
- Cling wrap and duct tape (for creating a custom leg mold)
- Velcro strips, adhesive-backed, for sole attachment
- Scissors and a ruler
The no-sew method is viable for one-time or short-term wear. For durability across multiple uses, the sewn version holds up significantly better.
How to Make DIY Boot Covers: Step-by-Step
DIY boot covers are straightforward provided you measure carefully before cutting. Rushing the pattern step is the single most common reason covers come out lopsided or too tight.
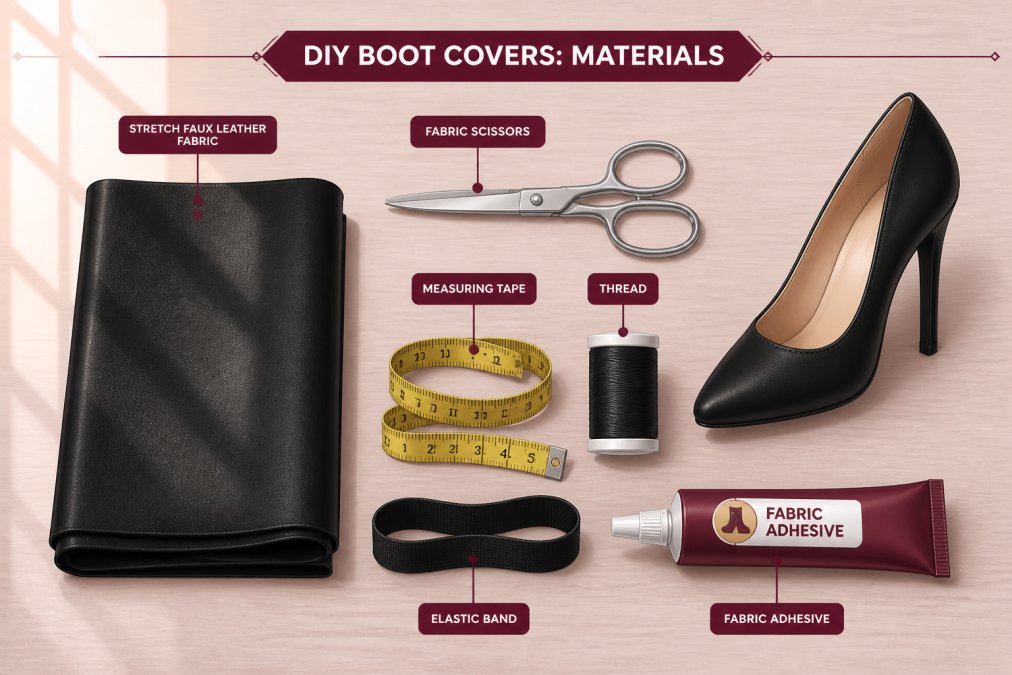
Step 1: Measure Your Leg and Create a Pattern
Accurate leg measurements are the foundation of a custom fit boot cover. Measure:
- Calf circumference at the widest point
- Knee circumference if making a knee-high or thigh-high cover
- Thigh circumference at the widest point (for thigh-high covers)
- Length from the top of your shoe to where you want the cover to end
Add 1 inch to each circumference measurement for seam allowance and ease of movement. For the no-sew method, add an extra half inch because fabric adhesive creates a slightly stiffer seam than stitching.
The cling wrap and duct tape method creates a precise mold of your leg. Wrap your leg loosely in plastic wrap, then apply two to three layers of duct tape over it. Cut the mold off carefully, cut it open along one straight line, flatten it, and trace it onto paper. This becomes your pattern template and accounts for every curve in your leg automatically.
Step 2: Cut and Assemble the Cover
Transfer your pattern to the fabric, adding seam allowance markings before cutting. For stretch fabrics, always cut with the grain of the stretch running horizontally around the leg, not vertically. A vertical stretch orientation will cause the cover to sag and lose its shape.
For the sewing method:
- Cut two mirror-image panels from your pattern
- Pin the panels right sides together
- Sew along the back seam using a zigzag or stretch stitch at a 5/8-inch seam allowance
- Fold the top edge down by 1 inch, insert your elastic band, and stitch closed
- Hem the bottom edge with a narrow rolled hem or fabric tape
For the no-sew method:
- Cut a single panel sized to wrap around your leg with a 1-inch overlap at the back
- Apply fabric fusion tape along the overlap edge and press firmly
- Fold and tape the top and bottom hems
- Allow adhesive to cure fully before wearing, typically 24 hours
Step 3: Attach the Cover to Your Heel
A cover that isn't anchored to the shoe will ride up within an hour of walking. The most reliable attachment method:
- Cut a strip of adhesive-backed Velcro to match the width of your shoe's insole
- Attach the soft side to the inside bottom of the cover
- Attach the hook side to the insole of your shoe
- Press firmly and hold for 30 seconds
For a more permanent attachment, a thin strip of elastic sewn or glued under the arch of the foot creates a stirrup that holds the cover down without damaging the shoe. This method holds up best during extended walking.
Choosing the Right Fabric for Boot Covers
Fabric choice determines whether your boot covers look like an intentional fashion statement or a last-minute fix. The wrong material will gap, sag, or reflect light in ways that immediately read as costume rather than footwear.
| Fabric Type | Stretch Level | Best For | Durability |
|---|---|---|---|
| Stretch faux leather | Four-way | Polished, boot-like finish | High (multiple uses) |
| Spandex/lycra | Four-way | Form-fitting, athletic looks | Medium |
| Stretch velvet | Two-way | Evening wear, costume | Medium |
| Ponte knit | Minimal | Structured, tailored look | High |
| Stiff vinyl | None | Armored cosplay only | Low for movement |
For footwear transformation that looks convincing, four-way stretch faux leather is the clear first choice. It mimics the texture of real leather boots, moves with the leg naturally, and holds its shape through a full day of wear. Spandex in solid black or dark brown reads as sock boots from a distance and works well for casual styling.
Avoid stiff vinyl for any cover requiring movement. Stiff materials crease visibly at the ankle and knee with every step, which breaks the illusion immediately. As documented in the Fashion Institute of Technology's textile resource guide, stretch fabrics with four-way construction distribute tension evenly across the material, which is why they resist wrinkling during flexion.
Boot Sleeves for Heels: The Ready-Made Alternative
Making your own boot covers produces a custom fit, but it takes time, tools, and troubleshooting. For many women, a ready-made boot sleeve is a faster, more polished solution.
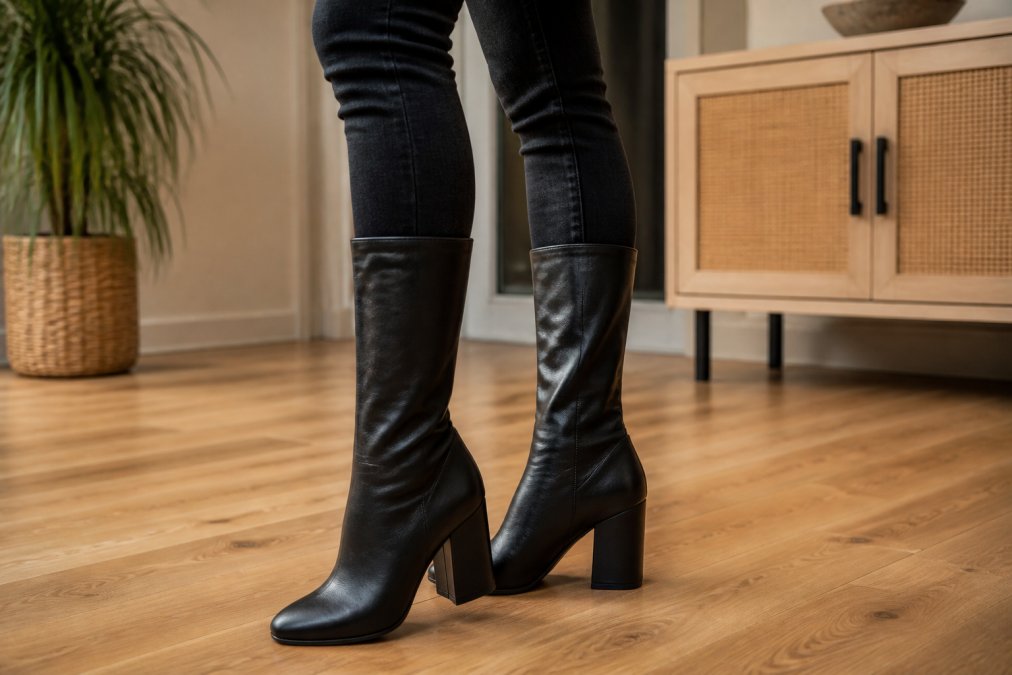
Bootsy - The Boot Sleeve was designed specifically to solve the fit problem that makes standard boot shopping frustrating. The patent-pending sleeve is sized by thigh and calf measurements rather than shoe size, covering a range from 14 to 60 inches, which means it accommodates leg proportions that standard retail simply doesn't address. The stretch faux leather and vinyl materials are the same ones professional DIYers reach for, but pre-engineered to maintain their shape through repeated use.
The practical difference between a DIY cover and a ready-made sleeve comes down to finishing quality. Ready-made boot sleeves also solve the sole attachment problem without requiring Velcro or stirrups.
Professional Finishing, Durability, and Maintenance
Most guides stop at "sew the seam and attach to the shoe." That's where the gap between a convincing boot cover and an obvious costume piece begins.
Professional finishing techniques:
- Edge finishing: Raw edges on stretch faux leather fray, but they still need finishing. A thin line of fabric glue along the hem edge prevents peeling over time.
- Seam pressing: Faux leather cannot be ironed directly. Press seams open using a seam roller or wooden spoon handle pressed firmly along the seam.
- Weatherproofing: For outdoor wear, a light application of fabric protector spray designed for synthetic materials adds water resistance.
Durability by method:
The sewn method, when executed with a stretch stitch, holds up to regular use significantly better than fabric adhesive. Adhesive bonds weaken with repeated flexing and exposure to body heat. If you're planning to wear boot covers more than three or four times, sewing is worth the extra effort.
Cleaning and maintenance:
- Spot clean faux leather covers with a damp cloth and mild soap. Avoid soaking.
- Never put stretch vinyl in a washing machine.
- Store covers flat or loosely rolled, not folded.
- For spandex covers, hand wash in cold water and lay flat to dry.
According to the American Cleaning Institute's fabric care guidelines, synthetic materials like vinyl and faux leather last significantly longer when cleaned with pH-neutral solutions rather than standard detergents.
How to Style Boot Covers for Any Occasion
Boot covers work across more outfit contexts than most people expect. The silhouette they create, a continuous line from foot to calf or thigh, is the same visual effect that makes tall boots a wardrobe staple.
For work: Pair a structured faux leather cover in black or dark brown with tailored trousers or a midi skirt. Keep the cover fitted rather than slouchy.
For evening wear: Stretch velvet or high-gloss vinyl covers over a stiletto heel create a thigh-high boot effect that works with mini dresses and fitted skirts.
For last-minute costumes: The no-sew method transforms a basic heel into armored cosplay boots, riding boots, or character-specific footwear in under an hour.
Fit adjustment tips:
- If the cover gaps at the ankle, add a small strip of elastic sewn horizontally across the inside of the ankle area
- If the cover is slightly loose at the calf, a single dart sewn up the back seam takes in the excess
- For petite legs, shorten the cover length proportionally rather than just hemming the bottom
Common Mistakes to Avoid When Making Heels Look Like Boots
The difference between a boot cover that works and one that doesn't usually comes down to a handful of avoidable errors.
Cutting without stretch direction in mind. Stretch fabric has a direction, and ignoring it produces a cover that either won't go on or won't stay up. Always confirm which direction has the most give before cutting your panels.
Skipping the fitting step. Cut your pattern, baste it together loosely, and try it on before sewing the final seam.
Using the wrong adhesive. Standard craft glue doesn't bond stretch fabric reliably. Use a product specifically rated for stretch materials, or use heat-activated fabric fusion tape.
Neglecting sole attachment. A cover without proper sole attachment will ride up within 20 minutes of walking. The stirrup method or Velcro insole attachment are both reliable solutions.
Mismatching fabric and heel type. A stiff, structured cover on a thin stiletto looks unbalanced. A very soft, drapey fabric on a chunky block heel loses its shape.
Overcomplicating the pattern for a first attempt. A simple two-panel construction with a back seam is enough to create a polished boot cover.
| Mistake | Fix | Impact on Final Look |
|---|---|---|
| Wrong stretch direction | Cut with horizontal stretch around leg | Prevents sagging and riding up |
| No sole attachment | Velcro insole or stirrup elastic | Keeps cover in place all day |
| Mismatched sheen | Match fabric finish to heel material | Creates seamless boot silhouette |
| Skipped fitting step | Baste before final seam | Avoids irreversible cutting errors |
| Wrong adhesive | Use stretch-rated fabric glue | Prevents seam separation during wear |
Making heels look like boots is a genuinely achievable DIY project, but the materials and finishing details make the difference between something that looks polished and something that reads as temporary. If you'd rather skip the construction entirely and get straight to the styling, Bootsy - The Boot Sleeve offers a ready-made solution sized by leg measurement rather than shoe size, with stretch faux leather and vinyl materials that work with both stiletto and block heels. Get started with Bootsy and transform the heels you already own into a full boot wardrobe.
Frequently Asked Questions
How can I make my heels look like boots without sewing?
The fastest no-sew method is to use stretch fabric cut to your leg measurements, secured with fabric adhesive or iron-on hem tape, and attached to your shoe with Velcro strips or an elastic strap under the sole. Faux leather and spandex work best because they hold their shape without stitching. For a completely tool-free option, a ready-made boot sleeve slides over your heel and stays in place through the fabric's stretch alone, with no adhesive or sewing required.
What are boot sleeves and how do they work?
Boot sleeves are fabric tubes sized to your calf or thigh measurement that slip over an existing heel or flat to create a boot silhouette. They work through the tension of stretch materials like faux leather or vinyl, which grip the leg without fasteners. You slide the sleeve up your leg first, then step into your shoe, letting the bottom of the sleeve drape over or tuck around the heel. Quality sleeves are sized by leg circumference rather than shoe size, so fit is based on your actual measurements.
Do boot sleeves stay up on the leg when walking?
Yes, when sized correctly. Sleeves made from stretch faux leather or high-recovery spandex maintain consistent tension against the leg throughout the day. The key is accurate leg measurement: take your calf and thigh circumference at the widest point and match them to the sleeve's size chart. A sleeve that is too large will bunch and slip. Some styles also include an elastic band at the top for extra hold, which is especially useful for thigh-high lengths during extended wear.
Can boot covers work on both stiletto and block heels?
Yes. The leg portion of a boot cover or sleeve fits independently of heel shape, so the same cover works on a thin stiletto and a chunky block heel. The main difference is how the bottom edge attaches: on a block heel, the extra surface area makes sole attachment easier and more stable, while a stiletto requires a snug elastic strap under the arch rather than a full sole wrap. Stretch fabrics accommodate both silhouettes without altering the cover's fit on your leg.
This article was written using GrandRanker
0 comments