

Table of Contents
- Why Loose Boots Cause Blisters and Heel Slip
- Step 1: Start With Proper Boot Fit and Sizing
- Step 2: Choose the Best Socks to Prevent Blisters in Boots
- Step 3: Master How to Lace Boots to Prevent Heel Slip
- Step 4: Add Strategic Padding to Reduce Friction
- Step 5: Manage Moisture and Sweat Control
- Step 6: Break In New Boots Gradually
- Step 7: How to Treat a Boot Blister Immediately
- Frequently Asked Questions
Last Updated: October 20, 2026
Why Loose Boots Cause Blisters and Heel Slip
To prevent blisters loose boots cause, understanding why they happen is the first step to solving the problem.
Moisture makes it worse.
Your heel slips up and down with each step, your toes slide forward on downhills, and your arch shifts side to side.
The good news is that you can prevent blisters loose boots cause, it's entirely fixable. It starts with proper fit, but it goes much deeper than just buying the right size.
Step 1: Start With Proper Boot Fit and Sizing
Proper boot fit is the foundation of blister prevention. Most people buy boots by shoe size alone, but boot fit also depends on thigh circumference, calf width, ankle thickness, and arch height.
A boot should feel snug without cutting off circulation. You should be able to fit one finger between your heel and the back of the boot when you're standing. Your toes should have about a thumb's width of space at the front. If there's more than that, your foot will slide. If there's less, you'll get pressure points.
Measure Your Thigh and Calf Circumference
Start by measuring your actual leg dimensions. Use a soft measuring tape at your widest point, usually mid-calf and mid-thigh, and write down both measurements in inches.
Traditional boot sizing ignores leg shape entirely. A woman with thick thighs but narrow calves might wear a size 8 shoe but need a completely different boot fit than another size 8 wearer.
Many people discover they've been buying the wrong fit their entire lives, and find a snug fit is actually comfortable once they have the right dimensions.
Check for Gaps and Pressure Points
Put on your boots with the socks you plan to wear. Stand up and walk around for five minutes. Pay attention to where you feel pressure. Look for gaps between your leg and the boot shaft.
Common problem areas:
- Gap at the back of the heel (classic heel slip)
- Tightness around the widest part of your calf
- Pressure on the sides of your ankle
- Rubbing on the front of your shin
If you see gaps, the boot is too loose. If you feel pinching, it's too tight. The goal is contact without compression.
Step 2: Choose the Best Socks to Prevent Blisters in Boots
Socks matter more than most people realize. The wrong socks will cause blisters even in a perfectly fitting boot. The right socks prevent them even in a slightly loose boot.
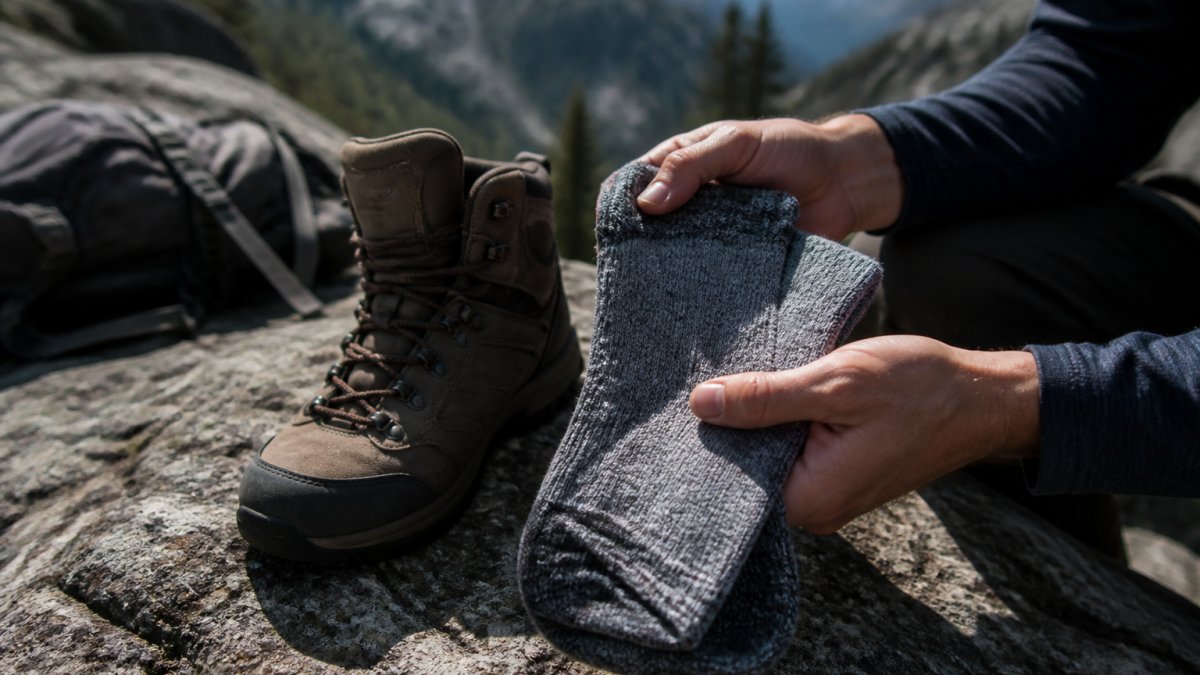
Avoid cotton at all costs. It absorbs moisture and holds it against your skin, staying wet and creating the perfect environment for maceration, the softening and breakdown of skin that leads to blisters.
Why Liner Socks Matter
Liner socks are thin, moisture-wicking socks worn underneath your main hiking or work socks. They serve one purpose: move sweat away from your skin.
They sit directly against your skin and wick moisture outward to your outer sock, creating a dry layer that prevents friction and reduces heat buildup.
Many people skip liner socks to save money, but that's false economy: a pair costs around $10-15 and prevents blisters that will sideline you for a week.
Moisture-Wicking Fabrics and Wool Blends
The best socks for boot wear combine synthetic fibers with wool. Merino wool blends are ideal. Wool naturally wicks moisture and regulates temperature. Synthetic fibers add durability and quick-drying properties.
Look for socks labeled "moisture-wicking" or "quick-dry," avoid anything that says "cotton blend," and aim for at least 50% synthetic or wool content.
Sock thickness also affects fit: a thick sock takes up more space inside your boot, so thinner socks work better in boots that are already fitted correctly.
Step 3: Master How to Lace Boots to Prevent Heel Slip
Lacing technique directly controls how much your foot moves inside the boot. The wrong lacing pattern lets your heel slip up and down. The right pattern locks your heel in place.
Most people lace boots like sneakers, straight across and tight everywhere. That doesn't work for hiking or work boots: you need variable tension, looser at the toe and tighter at the arch and heel.
The Heel Lock Lacing Technique
The heel lock technique is a specific lacing pattern that prevents heel slip. It uses the eyelets at the top of the boot to create a lock around your ankle.
Here's how to do it:
- Lace your boot normally from the bottom to about two-thirds of the way up
- At the second-to-last eyelet on each side, thread the lace through but don't cross it over
- Take the right lace and thread it through the left eyelet at the very top
- Take the left lace and thread it through the right eyelet at the very top
- Cross the laces and pull them tight
- Tie your boot normally
This creates a loop around your ankle that prevents upward heel movement, and the tighter you pull, the more secure your heel lock becomes.
Adjusting Tension for Snug Fit
Variable tension is key. Your toes need room to move slightly. Your midfoot needs snug contact. Your heel needs to be locked.
Tighten gradually as you move up the boot: the first few laces should be loose enough to fit a finger underneath, and by the heel lock they should be noticeably tighter.
This keeps pressure off your toes while preventing heel slip and reducing pressure points on your arch and ankle.
Step 4: Add Strategic Padding to Reduce Friction
Padding reduces friction at hot spots, the areas where your boot rubs hardest. Strategic padding doesn't add bulk. It just moves pressure away from vulnerable skin.
Tongue Pads and Adhesive Tapes
Tongue pads are foam inserts that cushion the top of your foot and reduce friction from the boot tongue. Adhesive tapes stick directly to your skin or sock to create a protective barrier.
Both work by reducing direct contact between your skin and the boot: instead of rubbing against rough material, your skin rubs against soft padding.
CROC | Chocolate Croc Thigh-High Boot Sleeve | XS–5X Thigh & Calf Fit →
Where to apply padding:
- Back of heel (most common blister location)
- Inside of ankle bone
- Top of foot where boot tongue contacts
- Sides of heel where boot shaft rubs
Apply adhesive tape before you put on your boot, let it set for a few seconds, and make sure it sits flat with no wrinkles or air bubbles.
Targeting Hot Spots and Pressure Points
Hot spots are areas that feel uncomfortable before they become blisters, and they're your early warning system. If you feel one, address it immediately.
Common hot spots in loose boots:
- Heel (from slipping up and down)
- Ball of foot (from forward sliding on downhills)
- Toes (from impact and compression)
- Ankle bone (from side-to-side movement)
Apply padding at the first sign of discomfort. Don't wait for a blister to form. Prevention is exponentially easier than treatment.
Step 5: Manage Moisture and Sweat Control
Moisture is the enemy of foot health. Wet skin is soft skin. Soft skin breaks down faster under friction.
Start with moisture-wicking socks, as discussed earlier. But socks alone aren't enough. You also need to manage moisture inside your boot.
Ventilation helps. If your boots have breathable mesh panels, use them.
Take breaks during long hikes or work days.
At the end of the day, dry your boots thoroughly. Remove the insoles and let them air dry separately.
Good foot hygiene prevents maceration and fungal growth. Wash your feet with soap and water. Dry them completely, especially between your toes.
Step 6: Break In New Boots Gradually
New boots need a break-in period. Breaking in means wearing them gradually so your feet adapt and the material softens.
Never wear new boots on a full-day hike or work shift. Start with short periods: one to two hours at a time.
During break-in, monitor your feet closely. Stop immediately if you feel hot spots forming.
The material will soften and conform to your foot shape. Leather stretches slightly. Synthetic materials become more flexible.
Some people use a shoe stretcher to speed up the break-in process. A stretcher applies even pressure to stretch the material.
Step 7: How to Treat a Boot Blister Immediately
If a blister forms despite your prevention efforts, treat it fast. Quick treatment prevents infection and reduces pain.
First Aid for Blisters on the Trail
Stop what you're doing immediately. Remove your boot and sock. Inspect the blister carefully.
If the blister is intact (skin not broken), don't pop it. The fluid inside protects the new skin forming underneath. Instead, apply an adhesive blister pad over it.
If the blister has popped, clean it with soap and water. Pat it dry. Apply an antibiotic ointment. Cover it with a sterile bandage or blister pad.
For severe blisters that prevent walking, you may need to tape the area heavily and continue carefully. Apply multiple layers of athletic tape or blister tape to stabilize the area and reduce movement.
Post-Hike Recovery and Skin Integrity
After a hike or long day, soak your feet in cool water for 15 minutes. This reduces swelling and cools the skin.
Apply a moisturizing lotion to prevent your skin from drying and cracking. Dry, cracked skin is more vulnerable to blisters.
Keep the area clean and protected while it heals. Avoid tight socks or boots until the blister closes completely.
If a blister shows signs of infection (increasing redness, warmth, pus, or swelling), see a healthcare provider.
Preventing blisters from loose fitting boots requires a multi-step approach: proper fit, the right socks, correct lacing, strategic padding, moisture management, and gradual break-in.
If you're struggling with loose boots or boots that don't fit your unique leg proportions, our CROC thigh-high boot sleeve ($35.99) or MINI mid-calf sleeve ($29.99) transforms your existing heels into perfectly fitted boots.


| Prevention Method | When to Apply | Expected Benefit |
|---|---|---|
| Proper boot fit and sizing | Before purchase | Prevents 80% of heel slip issues |
| Moisture-wicking socks with liners | Every wear | Keeps skin dry and reduces friction |
| Heel lock lacing technique | Before each use | Locks heel in place during movement |
| Strategic padding and tape | At first sign of hot spots | Prevents hot spots from becoming blisters |
| Moisture management and drying | End of each day | Prevents maceration and fungal growth |
| Gradual break-in period | First 2-3 weeks | Allows material to conform to your foot |
| Immediate blister treatment | At first sign of blister | Prevents infection and speeds healing |
Frequently Asked Questions
How can you prevent blisters when boots are too loose?
Start by measuring your thigh and calf circumference to ensure correct sizing. Use moisture-wicking liner socks, apply heel lock lacing to reduce heel slip, and add padding to hot spots with adhesive tapes. If your boots are significantly too loose, consider a boot sleeve designed to fit by leg measurement rather than shoe size, which can eliminate gaps and friction that cause blisters.
What socks help prevent blisters in boots?
Wear moisture-wicking liner socks made from wool blends or synthetic fibers that reduce friction and sweat buildup. Liner socks create a barrier between your skin and the boot, preventing maceration and blister formation. Avoid cotton, which traps moisture. Layer a thin liner sock under a thicker wool or synthetic sock for maximum blister prevention during extended wear.
How do you stop boots from giving you blisters?
Prevent blisters from loose fitting boots by combining proper fit assessment, the right socks, heel lock lacing, and strategic padding. Break in new boots gradually over short distances before long hikes. Manage sweat with moisture-wicking materials and ensure your boots have seamless construction where possible. If traditional boots don't fit your leg proportions, boot sleeves offer a travel-friendly alternative that sizes by thigh and calf measurements up to 60 inches.
How should you treat a boot blister immediately?
Stop activity and clean the area with water. If the blister is intact, cover it with a blister bandage or taping to reduce further friction. If it's already open, apply antibiotic ointment and a sterile bandage. For post-hike recovery, keep the area clean and dry to maintain skin integrity. Avoid popping blisters yourself, as this increases infection risk. Replace your boot padding and reassess your lacing technique before your next outing.
0 comments