

Table of Contents
- Why Boot Sleeves Slip Down (and What Actually Fixes It)
- The Best Fashion Tape for Boots: What to Look For
- How to Style Boot Sleeves So They Stay Put
- DIY Boot Sleeve Solutions for Extra Grip
- Storage and Care That Keep Boot Sleeves in Shape
- Fixing Fit Issues: Wide Calves, Petite Legs, and More
- Frequently Asked Questions
Last Updated: September 12, 2026
Why Boot Sleeves Slip Down (and What Actually Fixes It)
Boot sleeves slip down for one reason: the material isn't gripping anything. Unlike a traditional boot with a structured shaft, a sleeve relies on tension and friction against your leg. When that tension fails, gravity wins.
The fix depends on which problem you have. A sleeve that slides down needs more grip at the top; a sleeve that slouches needs structural support along the shaft. At Bootsy, we designed our boot sleeves to address both, sizing by thigh and calf circumference rather than shoe size so the sleeve fits the leg it's sitting on.

The Two Problems: Slipping vs. Slouching
Slipping is downward movement. The sleeve migrates toward your ankle as you walk. Slouching is the shaft losing its shape and folding or wrinkling instead of standing tall.
Most people treat these as the same problem and reach for the same fix. That's a mistake. Slipping is a grip issue; slouching is a structure issue. A sleeve that slouches because it lacks stiffness won't be saved by tape, and a sleeve that slips because the top opening is too loose won't be saved by extra foam. Diagnose first, then treat.
The Best Fashion Tape for Boots: What to Look For
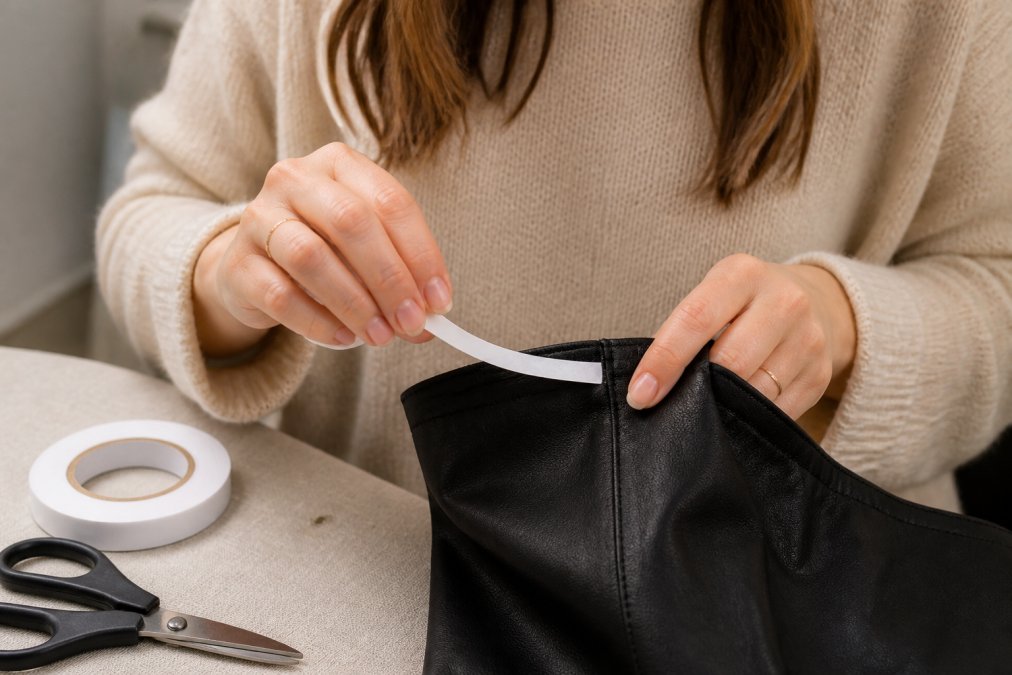
The best fashion tape for boots is a double-sided body tape rated for fabric-to-skin contact, not the paper-thin tape sold for hemming. Look for a tape that holds at least 8 hours, peels cleanly without residue, and comes in strips wide enough to cover the inside top edge of the sleeve.
Match the Tape to the Sleeve Material
Most guides treat every boot sleeve the same. They aren't. The inside lining decides which tape will hold and which will ruin the finish, the difference between a fix that lasts a season and one that lifts the finish off your sleeve.
| Sleeve lining | Best tape type | Why | Watch out for |
|---|---|---|---|
| Faux leather / PU | Medical-grade acrylic body tape | Acrylic adhesive grips PU without plasticizer migration | Solvent-based craft tape can dull the finish |
| Vinyl | Acrylic body tape, low-tack | Vinyl softens with heat; low-tack peels cleanly | High-tack tape leaves ghost residue |
| Suede (inside) | Suede-safe double-sided tape or silicone strips | Adhesive can mat the nap | Never press tape into visible suede |
| Knit / sweater sleeve | Fabric tape with woven backing | Woven backing flexes with the knit | Paper-backed tape cracks when the knit stretches |
| Stretch mesh | Silicone grip strips instead of tape | Mesh openings let adhesive bleed through | Tape shows through sheer mesh |
What Separates Tape That Works From Tape That Quits by Lunch
Three things decide whether tape survives a full day:
- Hold strength. Medical-grade acrylic adhesive outperforms craft-store tape. A tape rated for 8+ hours is the practical floor; "all-day" without an hour rating is a guess.
- Width. Narrow strips concentrate pressure and peel at the corners. Strips at least 3/4 inch wide distribute the load across the top edge.
- Residue. Cheap tape leaves sticky patches on faux leather and vinyl that attract lint and dull the finish. If the packaging doesn't say "residue-free" or "clean peel," assume it isn't.
How to Apply Fashion Tape So It Holds All Day
- Clean the inside top edge of the sleeve with a dry cloth. Oils and lint kill adhesion.
- Wipe the skin on your upper calf or thigh where the sleeve sits.
- Peel one side of the tape and press it along the inside top edge, smooth side out.
- Slide the sleeve on, then press the top edge firmly against your leg for 10 seconds.
- Give it two minutes before you start walking.
The mistake most people make is taping the sleeve before putting it on and then yanking it up the leg, which rolls the tape onto itself. Tape after the sleeve is positioned, or run a strip vertically down the back seam for a subtler hold.
Wearing Tape vs. Storing With Tape
Tape is a wearing solution, not a storage solution. Leaving it on between wears lets the adhesive cure into the lining and pick up lint. Peel tape off at the end of the day, wipe the inside edge with a dry cloth, and store the sleeve stuffed. For a set-and-forget fix, see the DIY section below for structural options that don't rely on adhesive.
How to Style Boot Sleeves So They Stay Put
How you style boot sleeves affects how well they stay up. Tighter, smoother fabrics under the sleeve create more friction than slick or bulky ones. Smooth leggings or tights give the sleeve something to grip; heavy denim or a chunky knit lets it slide. Most styling guides tell you what looks good and ignore what holds, both matter, and they usually point the same direction.
Outfit Choices That Help (and Hurt) Grip
| Choice | Effect on Grip | Why |
|---|---|---|
| Smooth leggings or tights | Helps | Creates friction against the sleeve lining |
| Bare skin (clean, dry) | Helps | Direct contact for fashion tape |
| Slick faux leather pants | Hurts | Low-friction surface lets the sleeve slide |
| Chunky knit or heavy denim | Hurts | Bulk pushes the sleeve up and out of place |
| Lotion or body oil | Hurts | Lubricates the contact point |
Keep the layer under the sleeve thin and matte. If you want to wear the sleeve over denim, choose a mid-calf length where the sleeve's top edge sits on skin rather than fabric.
DIY Boot Sleeve Solutions for Extra Grip
DIY boot sleeve solutions for extra grip split into two categories most guides blur: wearing fixes you put on with the sleeve, and storage fixes you build into the sleeve between wears. Pick the wrong category and you'll either tape a sleeve that needed structure or stuff a sleeve that needed grip.
Wearing Fixes (Quick, Reversible, On Your Leg)
These are the fixes you apply the moment the sleeve goes on, removable at the end of the day.
- Kinesiology tape. A strip along the inside back seam adds friction without bulk. It's flexible, stays put through movement, and peels off cleanly. Cut a strip roughly the length of the back seam and press it smooth-side out.
- Silicone grip strips. Sew or stick narrow silicone strips inside the top opening. Silicone grips skin and fabric better than most adhesives and leaves no residue, the safest option for suede-lined sleeves.
- Boot straps. A thin elastic strap looped under the arch and clipped to the sleeve's back seam stops downward creep on taller sleeves. It's the only wearing fix that also works over denim, because it anchors to the foot rather than the leg.
- Sock cuff trick. A folded athletic sock cuff worn under the sleeve's top edge adds a friction layer without tape. Cheap, washable, and invisible under stretch fabric.
Storage Fixes (Structural, Set-and-Forget)
These fixes give the shaft structure so it stands up instead of folding, and live inside the sleeve while it's stored or worn.
- Stiff foam strip. A strip of stiff foam along the back seam gives the shaft structure so it stands up instead of folding. Cut it slightly shorter than the shaft so it doesn't poke the top edge.
- Cardboard tubes. Paper-towel and mailing tubes hold the shaft open during storage and prevent creases from setting in.
- Pool noodle inserts. A cut-to-length pool noodle is firmer than cardboard and won't crush under stacked storage. Slit it lengthwise to slide it in and out without stretching the opening.
- Rolled magazines. The classic boot-tree substitute. Roll tightly, tape the roll so it doesn't unfurl, and slide it into the shaft. Works for tall sleeves; too bulky for ankle-height ones.
Sustainable Upcycling: What to Use Instead of Buying Inserts
Most guides stop at cardboard tubes and magazines. You can upcycle almost anything cylindrical and rigid, saving money and keeping waste out of the trash:
- Paper towel and toilet paper tubes, free, compostable, and the right diameter for narrow shafts.
- Wine bottle shipping tubes, rigid, tall, and already sized for a shaft.
- Pringles cans, sturdy, uniform, and won't collapse under a stacked shelf.
- Wrapped newspaper rolls, roll tightly, secure with rubber bands, and slide in. Replace when it softens.
- Old yoga mat cut into strips, a rolled strip makes a firm, reusable insert that won't shed like cardboard.
Which Fix to Reach For First
Match the symptom to the category:
| Symptom | Category | First fix to try |
|---|---|---|
| Slides down while walking | Wearing | Silicone grip strips or kinesiology tape |
| Folds or wrinkles in the shaft | Storage | Stiff foam strip or pool noodle insert |
| Rolls at the top edge | Wearing + fit | Size up, then add a strap |
| Loses shape over time | Storage | Stuff the shaft; stop folding flat |
Start with the wearing fix if the sleeve slips during the day; start with the storage fix if it looks tired before you put it on. Most people need both, grip for the day, structure for the off-season.
Storage and Care That Keep Boot Sleeves in Shape
Storage and care decide whether your boot sleeves still hold their shape next season. A structured leather boot holds itself up; a stretch sleeve collapses without help. Use these habits:
- Stuff the shaft. Rolled magazines, cardboard tubes, or boot trees keep the opening round.
- Hang or stand, don't fold. Folding sets creases that weaken the stretch over time.
- Clean by material. Faux leather and vinyl wipe clean with a damp cloth. Suede needs a soft brush and a suede protector, never water (nps.gov).
- Air them out. Let sleeves breathe between wears so moisture doesn't break down the lining.
Fixing Fit Issues: Wide Calves, Petite Legs, and More
Fit issues are the real reason most boot sleeves fail. A sleeve sized by shoe size will slip on almost every leg, because shoe size says nothing about calf circumference or thigh measurement. The fix is to size by the leg, not the foot. Bootsy sizes its boot sleeves by thigh and calf measurements from 14 to 60 inches, covering petite legs and wide calves in the same range. If your calf measures 18 inches and your friend's measures 22, you each order to your own number rather than guessing at a shoe size.
For a wide calf, a sleeve that's too small rolls at the top and slides, size up and use tape or silicone strips for grip. For a petite leg, a sleeve that's too large bunches and slouches, size down and add a strap to hold the top edge. Match circumference first, then adjust grip.
For a quick reference, match the symptom to the fix:
| Symptom | Likely Cause | Fix |
|---|---|---|
| Slides down while walking | Top opening too loose | Fashion tape, silicone strips, or strap |
| Folds or wrinkles in the shaft | No internal structure | Stiff foam or cardboard tube support |
| Rolls at the top edge | Sleeve sized too small | Size up; add grip at the top |
| Bunches around the calf | Sleeve sized too large | Size down; add a strap |
| Loses shape over time | Poor storage | Stuff the shaft; stop folding flat |
A boot sleeve is only as good as its fit. Get the circumference right and most slipping and slouching problems disappear before you ever reach for tape.
Frequently Asked Questions
How do I prevent boot sleeves from sliding down?
Start with a clean, dry leg. Apply double-sided fashion tape to the inside top edge of the boot sleeves and press firmly against your skin or tights. For extra security, wear fitted leggings or tights that create friction. If you have wide calves, choose a sleeve sized by calf circumference rather than shoe size, like Bootsy's options that fit 14 to 60 inches. Adjust the sleeve so the top sits at the widest part of your calf or thigh, where it grips naturally.
Can I use fashion tape to secure boot sleeves?
Yes, fashion tape is one of the best fashion tape for boots because it holds fabric to skin without damaging materials. Look for double-sided tape made for body use, not craft tape. Apply a few short strips along the inside top edge, then press the sleeve against your leg for 10 seconds. Avoid stretching the tape too thin. For all-day wear, carry extra strips for quick touch-ups. Test on a small area first if you have sensitive skin.
What are the best ways to keep over-the-knee boot sleeves from flopping?
Over-the-knee boot sleeves need support at the thigh. Choose a sleeve with a snug fit at the top, like those sized by thigh measurement. Use fashion tape or a thin elastic band sewn inside the top edge. Wear over tights or leggings to increase grip. If the sleeve still flops, try a DIY solution: cut a piece of stiff foam or cardboard tube to fit inside the top edge for structure. Store sleeves rolled, not folded, to prevent creases that weaken the fabric.
Do boot sleeves work for wide calves and petite legs?
Yes, when sized by leg circumference instead of shoe size. Bootsy's boot sleeves fit thigh sizes from 14 to 60 inches, so they work for wide calves and petite legs alike. For wide calves, choose a size that matches your calf measurement and use fashion tape to prevent slipping. For petite legs, select a smaller size and adjust the top to sit at the narrowest part of your leg. The stretch fabric adapts to your shape without sagging.
Boot sleeves that won't stay up usually trace back to a fit that never matched your leg in the first place. Bootsy solves that by sizing to thigh and calf circumference from 14 to 60 inches instead of shoe size, so the sleeve grips the leg it's actually sitting on. The patent-pending design works over heels and some flats, turning shoes you already own into thigh-high or mid-calf boots without a trip to the store. Get started with Bootsy and build a boot collection that finally fits.
0 comments