

Table of Contents
- What You'll Need: Materials and Tools
- Choosing the Right Base Heels and Stretch Fabric
- How to Make Heels Look Like Boots: Measuring Your Leg
- DIY Boot Sleeves for Heels: Cutting and Preparing Fabric
- Attaching the Fabric: Sewing vs. Gluing Methods
- Inclusive Fit Boot Accessories: Fitting and Adjustments
- Troubleshooting Common Fit Issues
- Frequently Asked Questions
Last Updated: September 2, 2026
What You'll Need: Materials and Tools
Gather quality stretch fabric, fabric glue or a sewing machine, measuring tape, fabric shears, and a seam ripper. You'll also need elastic bands or silicone grip strips to prevent slipping once attached to your shoe base.
High-quality stretch faux leather and vinyl materials work best, they mimic real boots while providing flexibility. Avoid thin, non-stretch fabrics; they won't conform properly to your leg. If sewing, use a ballpoint needle designed for knits. For gluing, use adhesive specifically formulated for textile bonding and test it on scrap fabric first.

Set up a workspace with good lighting, a flat surface for measuring and cutting, and access to a mirror for test fitting.
Choosing the Right Base Heels and Stretch Fabric
Stilettos and platform heels work best. Stilettos create an elegant line when extended with fabric, while platform heels provide stability and visual weight. Avoid thin, delicate heels, they look disproportionate when you add volume above them. Ankle boots are easier to work with than pumps because they already provide structure.
For stretch fabric, micro-suede mimics real suede boots with a sophisticated finish, spandex blends offer maximum stretch for wider calves, and stretch vinyl provides a sleek appearance and high durability. Heavier fabrics maintain shape better and resist wrinkling during storage.
Match fabric color to your heels, black heel with black fabric creates one continuous line, while contrasting colors can look intentional and stylish.
How to Make Heels Look Like Boots: Measuring Your Leg
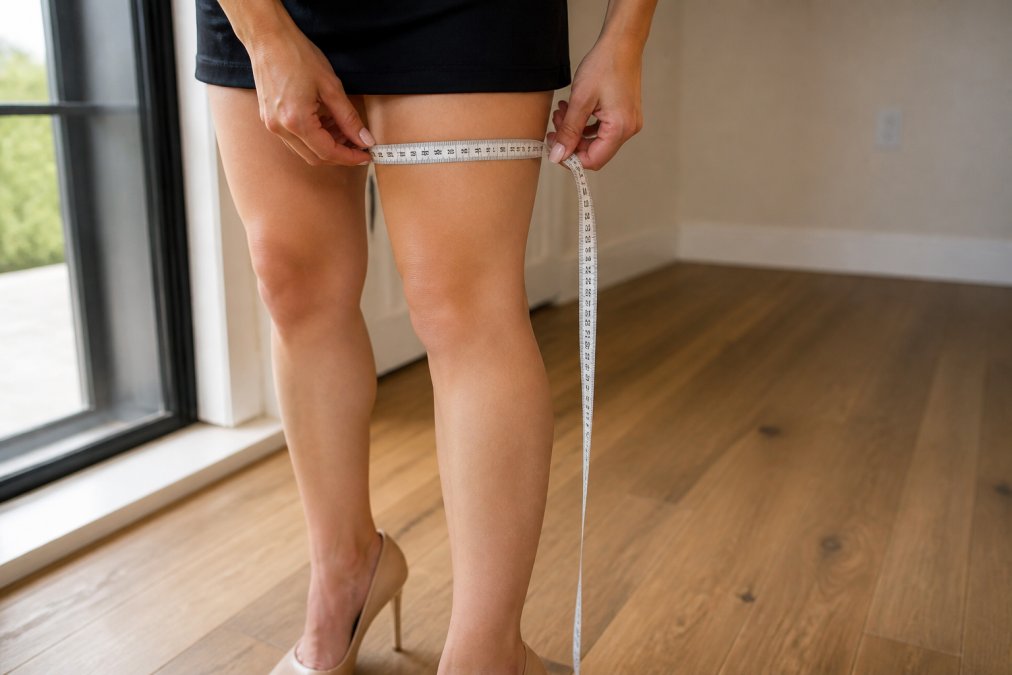
Measure at three points: your ankle, the widest part of your calf, and the widest part of your thigh. Use a soft measuring tape kept snug but not tight, you should slip one finger underneath. Write measurements down for reference.
For thigh-high boots, measure from the top of your thigh to where you want the boot to end. Most prefer coverage reaching mid-thigh or slightly above the knee. Measure while standing, as leg dimensions change slightly when seated.
Circumference matters more than length. If your thigh measures 22 inches around, your fabric needs to stretch to accommodate that comfortably. Too tight causes circulation problems; too loose causes constant slipping (the CDC).
Document measurements at different times of day. Your legs may swell slightly by evening, so account for this when cutting fabric by adding a quarter inch to your measurements (the NIH).
DIY Boot Sleeves for Heels: Cutting and Preparing Fabric
Use fabric shears, regular scissors will fray edges and create uneven cuts. Create a pattern using paper or newspaper to your desired length, then mark circumference at ankle, calf, and thigh points. Connect these points with a gentle curve rather than straight lines to create a tapered shape that fits naturally.
Cut two pieces of fabric: one for the front and one for the back. This two-piece construction creates a fitted sleeve rather than a loose tube. Test your pattern on scrap material first by pinning it around your leg and walking for a few minutes.
Add a half-inch seam allowance on all edges. Mark seam lines with tailor's chalk so you have a guide when sewing or gluing.
Attaching the Fabric: Sewing vs. Gluing Methods
Sewing creates a stronger, more durable bond. Use a ballpoint needle and stretch thread with a stretch stitch setting if available. Sew the two fabric pieces together along marked seam lines, starting at the ankle and working upward. Hand-stitch the fabric to the shoe base, anchoring it at multiple points around the heel.
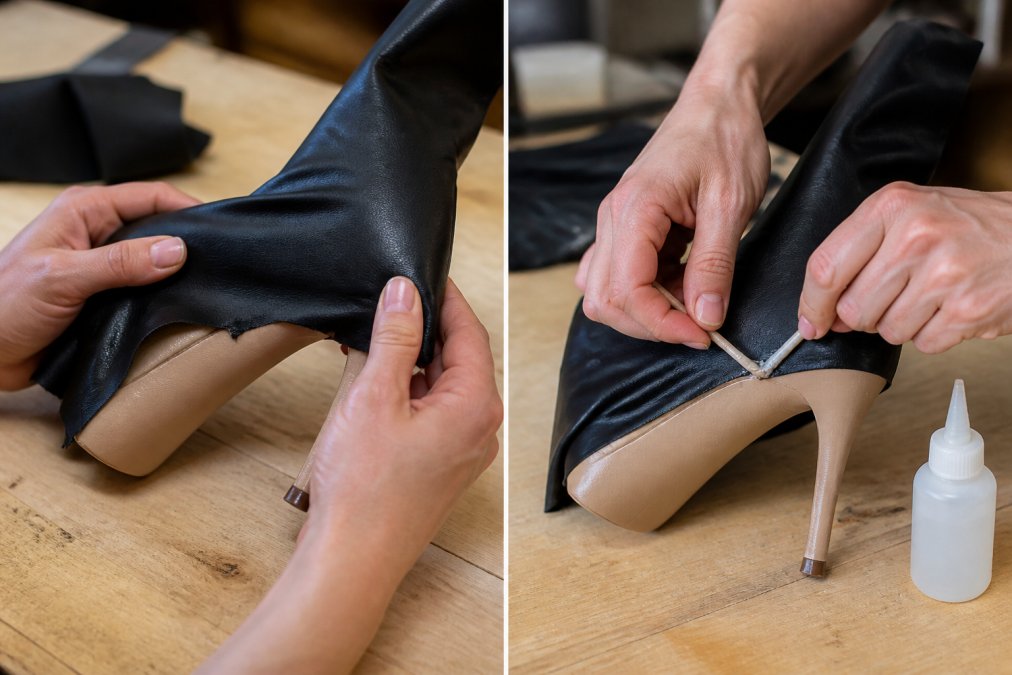
Gluing is faster and requires no sewing skills. Use adhesive formulated specifically for textiles. Apply in a thin, even line to the shoe base, then press fabric onto it. Hold in place for the time specified on the package.
Gluing has a key advantage for travelers: it's non-destructive. You can remove the fabric later by carefully peeling it away, and your heels return to their original state. The disadvantage is durability, expect to re-glue every 6-12 months with daily wear (peer-reviewed research).
Many crafters use a hybrid approach: glue the fabric to the shoe base for easy removal, then sew the fabric pieces together where they meet on your leg.
Inclusive Fit Boot Accessories: Fitting and Adjustments
Put on your heels and slide the boot sleeve up your leg. It should feel snug but not restrictive, you should slip one finger between fabric and skin comfortably. If too loose, it will slip down. If too tight, it will cut off circulation.
For people with wide calves or thighs, fit is often the biggest challenge. Standard boot sizing assumes proportional legs. Custom-fitted boot sleeves sized by thigh and calf measurements from 14 inches to 60 inches accommodate body types that standard retail boots don't fit.
If your boot sleeve is too loose at the ankle, add silicone grip strips inside the ankle area. These adhesive strips grip your skin and prevent slipping without adding bulk.
Test fit by sitting, standing, and walking. The boot should stay in place during all movements. If it creeps down when you sit, add elastic bands at the thigh for additional security.
Troubleshooting Common Fit Issues
Slipping: If the boot slides down constantly, the ankle circumference is too large. Add silicone grip strips inside the ankle, or take in seams if sewn.
Bunching: Fabric that wrinkles usually means circumference is too large at that point. Take in seams at the bunching point and reattach.
Cutting off circulation: Numbness or tingling means the boot is too tight. Remove immediately and remake with larger measurements.
Visible gaps: If there's space between fabric and leg, circumference is too large. Add elastic bands over the fabric to cinch tighter.
Creasing at the heel: Smooth creases by gently stretching fabric and using fabric glue to hold it flat while drying.
Fabric wrinkling during storage: Store boots upright in a breathable bag rather than folded. Light steaming removes wrinkles, use low heat and keep steamer away from glued areas.
Heel separation: If the heel separates from fabric, the adhesive is failing. Clean both surfaces, let dry completely, then re-glue with fresh textile adhesive.
Transforming heels into thigh high boots gives you endless styling options without buying new footwear. Whether you choose sewing or gluing, accurate measurement and quality materials are key. For those with wider calves, thighs, or non-standard measurements, custom-fitted solutions like Bootsy- The Boot Sleeve's size-inclusive boot sleeves eliminate guesswork, engineered specifically for leg circumference rather than shoe size, accommodating measurements from 14 to 60 inches. Their patent-pending stretch faux leather design transforms heels into thigh high boots in seconds. Get started with Bootsy- The Boot Sleeve and discover how a single pair of heels becomes an entire wardrobe of boot styles.
Frequently Asked Questions
Q: Can you turn regular heels into thigh high boots at home?
A: Yes, you can transform heels into thigh high boots using stretch fabric, adhesive, or a sewing machine. The key is selecting the right base heel (one with a stable ankle area), measuring your leg circumference accurately, and choosing durable stretch fabric like micro-suede or spandex blends. Most people complete the project in 2-4 hours, and the results can be very satisfying when done properly.
Q: What materials work best for DIY boot sleeves for heels?
A: Stretch micro-suede, spandex blends, and high-quality stretch faux leather are ideal because they conform to your leg shape while maintaining durability. Avoid rigid fabrics that won't flex. Look for materials with at least 20% stretch content. Vinyl works well for a sleek look but offers less breathability. Test any fabric's stretch and recovery before committing to your full project.
Q: How do I know if my thigh measurements will fit a boot sleeve?
A: Measure your thigh circumference at the fullest point and your calf at the widest point using a soft measuring tape. Most quality boot sleeves accommodate thigh sizes from 14 to 60 inches, making them inclusive for all body types. If you have wide calves or plus-size thighs, verify the sleeve's maximum stretch before purchasing. Bootsy's sleeves are specifically designed by leg circumference rather than shoe size, ensuring a proper fit regardless of your proportions.
Q: Will a DIY boot sleeve stay in place all day?
A: A well-fitted boot sleeve stays secure through silicone grip, elastic bands at the top, and proper tension from the stretch fabric itself. The key is measuring accurately and ensuring the fabric grips both your leg and the shoe base firmly. If slipping occurs, add a thin silicone grip strip inside the top edge or adjust how tightly you stretch the fabric when attaching it. Test your fit by walking around for 15 minutes before wearing it out.
This article was written using GrandRanker
0 comments