

Last Updated: October 24, 2026
Quick Summary
Choosing the right insoles for boot fit starts with understanding your foot's shape, width, and arch height, then measuring your boot's interior space to ensure the insole leaves enough room for your foot. Match the insole's length, width, and thickness to your boot's dimensions, and select arch support and cushioning suited to your activity level and work surface.
- Identify your arch height by checking your footprint: high arch leaves a curved print, flat arch a fuller one, normal arch falls in between.
- Measure boot interior length, width at the ball, and depth at heel and instep before buying an insole.
- Keep about 3/8 to 1/2 inch of toe-box room between your longest toe and the boot front with the insole installed.
- Break in new insoles gradually: start with 1-2 hours on day one, increase to 2-4 hours days 2-3, then half-day wear days 4-7.
- Replace insoles when the surface stays flattened after pressing, arch support no longer feels supportive under load, or pressure points return.
Table of Contents
- Assess Your Foot Shape, Width, and Arch Height
- Measure Boot Volume and Interior Space Before Buying
- Boot Insoles for Arch Support: Matching Support to Your Needs
- Work Boot Insoles for All-Day Comfort: Cushioning and Shock Absorption
- How to Trim Insoles to Fit Boots Perfectly
- Boot Insole Thickness and Fit: Finding the Right Profile
- Fitting, Breaking In, and Troubleshooting Your Insoles
- Getting the Perfect Fit with Your New Insoles
- Frequently Asked Questions
Assess Your Foot Shape, Width, and Arch Height
Choosing the right insoles for boot fit starts with understanding your foot's shape, width, and arch height, since these determine the support and comfort you need.
Next, measure your foot width at its widest point, it isn't the same as shoe size.
Consider foot shape too: some people have narrow heels with wide forefeet, others are consistently wide. Your insole should match your foot's natural contours, not force it into a different shape.
Measure Boot Volume and Interior Space Before Buying
Boot volume is the total usable space inside the boot, length, width, and height above the footbed. Insoles consume that volume, so pick one that leaves enough room for your foot.
Step 1: Measure the boot's interior length. Remove the factory footbed if possible and run a soft tape from the heel counter to the inside tip of the toe, recording inches.
Step 2: Measure the interior width at the ball. Measure across the widest part of the interior, typically at the ball.
Step 4: Measure the insole you are considering. Compare its published length, width, and thickness to your boot measurements:
- Length: Match the boot's interior length within about 1/8 inch after trimming; a longer insole curls at the toe or pushes your foot back into the heel.
- Width at the ball: Equal to or slightly narrower than the boot's interior width; wider creates sidewall pressure, much narrower lets the foot roll over the edge.
- Thickness at the heel and forefoot: Compare to the factory footbed. Roughly 1/8 inch or more of difference at the heel changes heel hold; the same at the forefoot reduces toe-box room.
Step 5: Run three boot-specific fit checks before you buy:
- Toe-box room: With the insole in place, keep about 3/8 to 1/2 inch (a thumb's width) between your longest toe and the front of the boot. Less than that and a thicker insole cramps your toes on downhills and long standing shifts.
- Heel hold: With the boot laced, rise onto your toes and walk a few steps. Your heel should lift no more than about 1/4 inch; a thicker insole raises the heel in the cup and can increase lift.
- Instep pressure: Lace normally and feel for even pressure across the top of your foot, not a concentrated pinch. A high-volume insole under a low instep is the most common cause of numbness and lace-pressure pain.
If your boot has a removable factory footbed, note its thickness before discarding it. A replacement within about 1/8 inch of that baseline is the safest way to preserve the boot's original fit; if you need more cushioning, adjust lacing and sock thickness rather than forcing a thick insole into a low-volume boot.
Boot Insoles for Arch Support: Matching Support to Your Needs
Flat feet need more arch support, since flat arches provide no natural support.
High arches need moderate support: they concentrate pressure on the heel and ball, and balanced arch support spreads it more evenly.
Normal arches need moderate support matched to activity level: firm arch support for all-day work boots, lighter support for occasional wear.
Proper alignment reduces strain on your ankle, knee, and hip, while misalignment causes pain that travels up your leg.
Arch support needs vary by foot type and activity level.
| Arch Type | Support Level | Best For |
|---|---|---|
| Flat feet | Firm, contoured support | Distributing pressure evenly |
| High arches | Moderate support | Spreading pressure from heel and ball |
| Normal arches | Moderate support matched to activity | Firm support for all-day work boots |
Work Boot Insoles for All-Day Comfort: Cushioning and Shock Absorption
Work boot insoles need strong cushioning and shock absorption.
Foam provides soft, responsive cushioning; gel offers firm support with shock absorption; some insoles combine both.
Thickness affects cushioning: thicker insoles cushion more but take up space, thinner ones fit tighter boots but cushion less.
Consider your work surface: concrete is harder and creates more impact than asphalt, which has slight give. Choose insoles rated for your specific environment.
How to Trim Insoles to Fit Boots Perfectly
Many insoles come full-length and need trimming to fit your boot, which keeps them from shifting and causing discomfort.
Place the insole inside your boot and mark where your heel sits and where your toes end.
Trim gradually, testing the fit as you go; it's easier to trim more than to add material back, and an over-trimmed insole is useless.
After trimming, sand the edges smooth with fine-grit sandpaper to prevent irritation while walking and standing.
Boot Insole Thickness and Fit: Finding the Right Profile
Low-profile insoles are thin and suit dress boots or boots with minimal interior space, offering modest arch support and cushioning for boots that already fit snugly.
Full-profile insoles are thicker, with firmer arch support and better shock absorption.
Check your boot's original footbed: your replacement should have a similar thickness, or a much thicker one won't fit properly.
Thickness also affects heel fit and toe-box room: a thicker insole lifts your foot higher, changing how your heel sits and reducing toe-box room.
Fitting, Breaking In, and Troubleshooting Your Insoles
A repeatable fitting sequence prevents most problems people blame on the insole. Treat installation, break-in, and troubleshooting as three stages, changing one variable at a time.
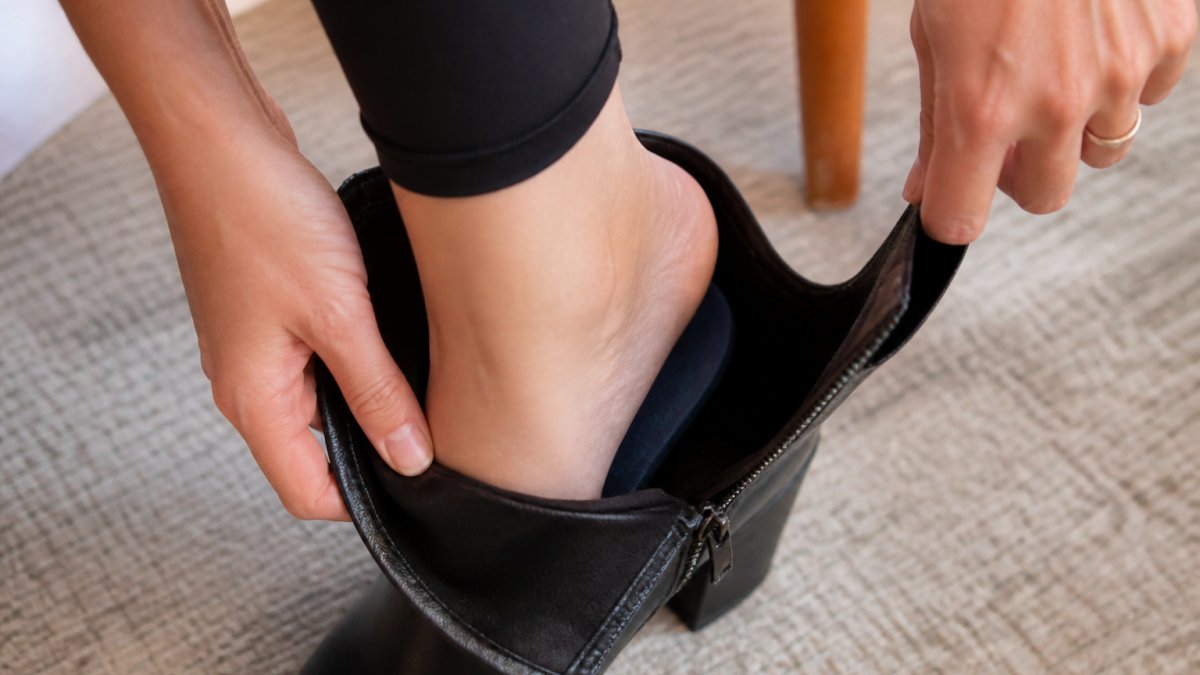
Stage 1: Install and trim in the right order
- Remove the factory footbed if removable and keep it, it's your thickness baseline and fallback.
- Trace the replacement insole on top of the factory footbed with a pencil for a trim line matching the boot's actual footprint.
- Trim in small increments, about 1/8 inch inside the traced line first, then test and trim again. Use sharp scissors or a utility knife; ragged edges create pressure points.
- Sand the edges with fine-grit sandpaper so the rim doesn't rub the lining or your foot.
- Seat the heel first, pressing it firmly into the heel cup, then work forward to the toe. An unseated heel slides forward and bunches under the arch.
Stage 2: Break in on a schedule
New insoles change how your foot loads, so give your feet time to adapt:
- Day 1: 1-2 hours of light wear at home.
- Days 2-3: 2-4 hours per day, including some standing.
- Days 4-7: Half-day wear, including your normal work surface.
- Week 2 onward: Full-day wear if no pressure points have appeared.
If a pressure point appears, drop back a step for a day or two rather than pushing through. Soreness that fades within an hour of removing the boots is normal; sharp or numbing pain is not.
Stage 3: Troubleshoot by symptom
Match the symptom to the likely cause before changing anything:
- Heel slipping or lifting: The insole is too thin at the heel or the heel cup isn't fully seated. Reseat the heel, try a slightly thicker insole, or add a heel pad.
- Cramped or numb toes: The insole is too thick or long at the forefoot. Trim the toe area 1/8 inch at a time, or switch to a lower-profile insole.
- Arch pressure or a hot spot: The arch support is too firm or too far forward. Sand the arch down slightly, or choose a softer arch profile.
- Instep pressure or lace pain: The insole adds too much volume under the top of the foot. Switch to a thinner insole or adjust lacing.
- Bunching or sliding: The insole is too narrow or unevenly trimmed. Re-trim the edges and check width against the boot's interior at the ball.
- Blistering at the heel or toes: Friction from movement. Confirm heel hold and toe-box room, then fix the underlying fit rather than taping over the symptom.
Some people need to prevent blisters from loose fitting boots while breaking in new insoles. Blisters come from friction between skin and boot; proper fit reduces it, and if blisters develop, treat them immediately and adjust your insole fit.
When to stop adjusting and replace instead
Insoles compress and lose resilience over time. Replace them when the surface stays flattened after you press it, the arch no longer feels supportive under load, or the same pressure points return after weeks of comfort. Rotating a spare set extends the life of both pairs.
Getting the Perfect Fit with Your New Insoles
Achieving the perfect fit with your new insoles takes testing and adjustment before you rely on them for a full day of work or activity.
Watch for pressure points, concentrated discomfort at the ball, outside edge, or heel, and adjust your insole or boot accordingly.
Once fit is confirmed, you can stop boots from slipping by ensuring your insole sits securely.
Insole fit changes over time as insoles compress and wear, providing less support and cushioning.
Frequently Asked Questions
How do I know if insoles for boot fit are right for my foot shape and width?
Start by identifying your foot shape: neutral, high-arched, or flat. Check your foot width by standing on paper and tracing your outline, or measure across the ball of your foot. Compare these measurements to the insole's width rating and arch height. Many insoles come in multiple widths, and some are trim-to-fit, allowing you to customize them to your exact foot volume. If your foot is wider than standard, look for insoles explicitly labeled for wide feet or those with adjustable trimming options.
Can boot insole thickness and fit affect how my boots feel?
Yes, significantly. Thicker insoles add cushioning and support but reduce interior boot space, which can create pressure on your toes or instep. Thinner, low-profile insoles preserve more room inside the boot but offer less shock absorption. Measure your boot's interior volume and compare it to the insole's thickness before purchasing. A full-length insole takes up more space than a three-quarter or heel-only insert. The right thickness balances your need for support and cushioning with available boot volume.
What should I do if my insoles slip or bunch up when I'm walking?
Slipping usually means the insole is too small or the boot's interior is too loose. Use adhesive insole pads or double-sided tape on the bottom of the insole to anchor it to the boot's factory footbed. If bunching occurs at the toe or instep, your insole may be too thick for your boot's volume, or you may need a narrower width. Break in new insoles gradually over 1-2 weeks, wearing them for a few hours at a time. If problems persist after the break-in period, consider a different thickness or trim-to-fit option.
How long do boot insoles typically last before I need to replace them?
Most insoles last 6-12 months with regular daily use, depending on material quality, your body weight, and activity level. Foam and gel insoles wear faster than firmer materials. Signs of wear include flattening of cushioning, reduced arch support, visible creasing, or cracks in the material. If you're using your boots for work on concrete or asphalt, expect faster wear. Check your insoles every few months for compression, and replace them when comfort or support noticeably declines.

0 comments