

Table of Contents
- Why Boots Slip and What Causes Heel Slippage
- Step 1: Check Your Boot Size and Heel Counter Fit
- Step 2: Master Lacing Patterns to Lock Your Heel
- Step 3: Use Heel Grips for Boots to Reduce Slipping
- Step 4: Add Insoles and Tongue Pads for Volume Control
- Step 5: Optimize Sock Thickness for a Secure Fit
- Step 6: Use Stretchy Boot Sleeves for Thick Thighs
- How to Make Boots Fit Tighter Without Professional Help
- Frequently Asked Questions
Last Updated: September 3, 2026
Why Boots Slip and What Causes Heel Slippage
Heel slippage occurs when there's too much space between your foot and the boot's heel counter. The boot's upper moves while your heel stays in place, creating friction and discomfort. The heel counter, the reinforced section at the back of the boot, should cradle your heel snugly. When it's too loose, your heel lifts with each step, causing the boot to slip down and leading to blisters, calluses, and altered gait patterns.
Several factors contribute to heel slippage: sizing inconsistency across brands, shallow heel cups, wider forefeet than heels, thin socks, and loose lacing. The good news is that heel slip is one of the most solvable fit problems, with proven methods to lock your heel in place.
Step 1: Check Your Boot Size and Heel Counter Fit
Before investing in solutions, verify that your boots are actually the right size. Stand in your boots with normal socks on, your heel should not lift when you walk. If it does, you have either oversized boots or a shallow heel counter for your foot shape.
Walk around for a minute, then remove the boot and check for red marks on your heel. A properly fitted boot shows even pressure across your heel area. If the boots are genuinely too large, consider exchanging them. However, many people find their boots are the right length but have too much volume around the heel.
Measure your heel width at the widest point. If you have a narrow heel but a standard or wide forefoot, heel slippage is almost guaranteed in off-the-shelf boots unless you address the volume difference. This is where solutions like heel grips and insoles become essential.
Step 2: Master Lacing Patterns to Lock Your Heel
The way you lace your boots dramatically affects heel security. Most people lace boots the same way they lace shoes, but this doesn't create the heel lock needed for boots.
The heel-lock lacing technique is the most effective DIY solution. Lace your boot normally up to the second-to-last eyelet. At that point, thread the lace up through the eyelet on the same side, creating a loop. Then cross the lace over and thread it through the loop on the opposite side. Pull tight. This creates a mechanical lock that prevents your heel from lifting.
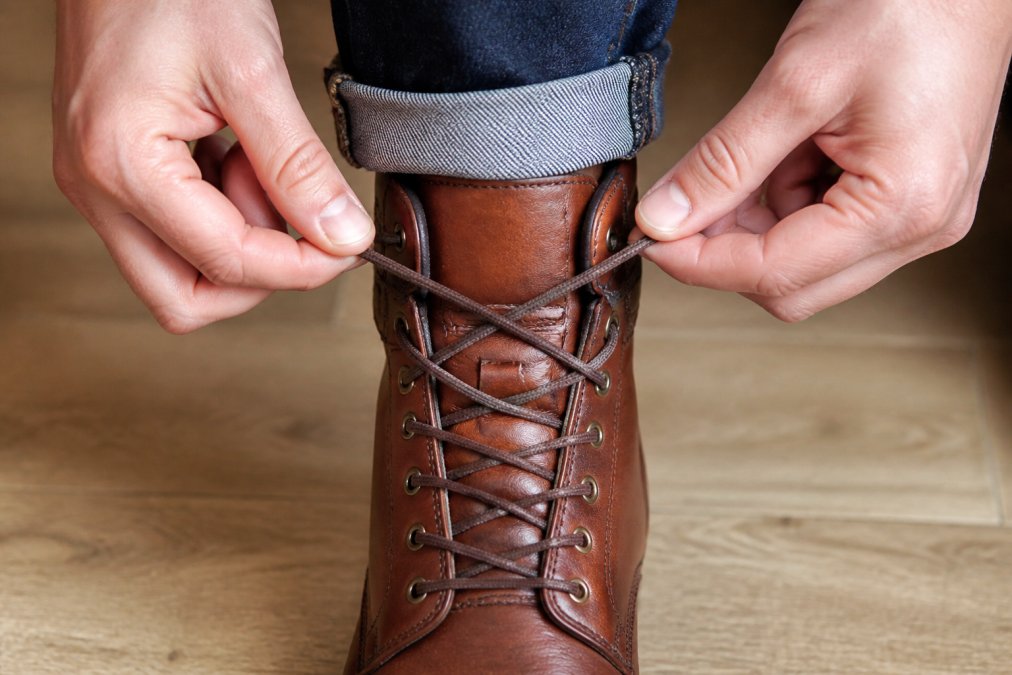
The tension at your ankle is critical. You should have moderate tension throughout, with slightly more pressure at the ankle and heel. Your foot should feel locked in place, not squeezed. Practice this for a few days, it becomes automatic once you develop the habit. Many people find that proper lacing alone reduces or eliminates heel slippage, especially when combined with appropriate socks.
Step 3: Use Heel Grips for Boots to Reduce Slipping
Heel grips are adhesive-backed pads that stick to the inside of your boot's heel counter, reducing the space between your heel and the boot. This is one of the most popular solutions because it's inexpensive, reversible, and requires no special installation.
Heel grips come in several types: adhesive-backed foam or gel pads are most common and provide good cushioning, while others use tacky rubber material for high friction. Installation is straightforward, clean the inside of your boot's heel counter with a dry cloth, peel the backing, and press the grip firmly into place, starting from the bottom to avoid air bubbles.
High-quality grips last several months with regular wear (the American Academy of Dermatology). If your grip starts peeling, you can reapply or replace it. The main limitation is that heel grips work best for mild to moderate slippage. If your boots are significantly oversized or your heel is very narrow, combine grips with other methods like proper lacing or insoles.
Step 4: Add Insoles and Tongue Pads for Volume Control
Insoles serve double duty: they provide arch support and reduce excess volume in your boot. When you add an insole, your foot sits higher inside the boot, reducing space around your heel. This is especially effective if your boots have a wide forefoot but narrow heel.
Choose insoles designed for boots rather than casual shoes. Orthotic insoles with arch support and heel cups are particularly effective because they stabilize your entire foot, reducing the micro-movements that cause slipping. Measure your insole carefully to ensure it fits snugly without bunching.
Tongue pads are thin foam or gel pads that attach to the inside of your boot's tongue, reducing the gap between the tongue and your foot. This prevents your foot from sliding backward and lifting your heel. Install them the same way as heel grips. Many people combine tongue pads with heel grips for comprehensive volume reduction.
The combination of insoles plus heel grips plus proper lacing addresses most moderate slippage issues by tackling the problem from multiple angles.
Step 5: Optimize Sock Thickness for a Secure Fit
Sock thickness directly affects boot fit. Thin socks leave more space around your foot, while thick socks fill that space and create a snugger fit. The ideal sock for boots is merino wool or synthetic blend in medium to heavy weight (peer-reviewed research). These materials provide cushioning, wick moisture, and maintain thickness when wet. Avoid cotton socks, they absorb sweat, become thin when damp, and lose cushioning properties (peer-reviewed research).
Most people underestimate how much sock thickness matters. If you're experiencing heel slip, try switching to heavier socks before buying additional products. Many cases of mild slippage resolve simply by choosing the right sock weight. Consistency matters too, wear the same sock weight regularly so you can dial in your lacing tension and other adjustments based on a constant variable.
Step 6: Use Stretchy Boot Sleeves for Thick Thighs
Boot sleeves wrap around your leg and create a compression seal that prevents your foot from sliding down inside the boot. They're particularly useful if your boots fit well in the forefoot but slip at the heel, or if you have a narrower calf than the boot is designed for.
Stretchy boot sleeves are made from high-quality stretch faux leather or vinyl that conforms to your leg shape. The compression creates friction against the inside of the boot, mechanically preventing your heel from lifting. When you walk, the sleeve creates outward pressure on the boot shaft, compressing the boot against your leg and creating a seal that prevents independent movement.
Finding the right fit is critical. Boot sleeves are sized by thigh and calf circumference, not shoe size. Measure your thigh at the widest point and your calf at the fullest point. A properly fitted sleeve should feel snug but not restrictive.
Bootsy- The Boot Sleeve offers a patent-pending design that transforms your favorite heels into stylish boots while addressing fit and slippage issues. Their sleeves are sized by thigh and calf measurements from 14" to 60", accommodating many body types without requiring new boots. The high-quality stretch materials maintain their shape and compression through repeated wear.
Boot sleeves work best when combined with proper lacing and appropriate socks. Quality sleeves maintain their stretch and compression for extended periods.
How to Make Boots Fit Tighter Without Professional Help
If you've tried the methods above and still experience slippage, combine all the solutions: proper lacing, heel grips, insoles, appropriate socks, and possibly boot sleeves. Most moderate slippage resolves with this comprehensive approach.
For boots that are slightly too large, add multiple layers of insoles or heel grips. Use a thin insole in the forefoot and a thicker one under your heel to create a graduated slope. Layer heel grips if needed, two thin pads often work better than one thick pad.
Another DIY approach is padding the sides of the heel counter. Cut small pieces of adhesive-backed foam and apply them to the inner sides of the heel counter, creating a narrower cup. Start with thin padding and add more if needed.
For boots with loose tongues, double up on tongue pads or use a thicker pad. When to consult a professional cobbler: if your boots are significantly oversized, if the heel counter is structurally too wide for your foot, or if you've tried multiple solutions without success. A cobbler can narrow the heel counter, add internal padding, or replace the insole with a custom orthotic. They can also assess your gait and foot biomechanics to recommend targeted solutions.
Heel slippage doesn't mean abandoning boots you love or spending hundreds on new pairs. Proper lacing, heel grips, insoles, sock selection, and boot sleeves address the root causes of slipping and work for most fit issues. Start with the simplest solutions like lacing technique and sock thickness, then layer in additional fixes as needed. For persistent problems, Bootsy- The Boot Sleeve's patent-pending design offers a comprehensive solution that transforms your existing heels into perfectly fitting boots by addressing volume and compression through high-quality stretch materials. Get started with the right combination of solutions and enjoy boots that stay in place all day.
Frequently Asked Questions
Why are my feet sliding forward in my boots?
Your boots are slipping because there's excess volume between your foot and the boot's heel counter, or your heel counter is too loose for your foot shape. This happens when boots are slightly oversized, when the heel counter lacks adequate cushioning, or when your foot anatomy doesn't match the boot's internal shape. Loose lacing, thin socks, or a break-in period can also cause forward sliding. Start by checking if you're wearing the right size, then try heel grips or insoles to fill that gap.
How do stretchy boot sleeves for thick thighs help prevent heel slip?
Stretchy boot sleeves create a secure, snug fit around your leg and calf, which anchors your foot in place and reduces the movement that causes heel slip. Because they're sized by thigh and calf measurements rather than shoe size, they accommodate your actual leg proportions and provide consistent friction and support throughout wear. This prevents the downward sliding motion that occurs when boots are too loose in the upper leg or calf area, keeping your heel locked in the boot's heel counter.
Can heel grips for boots really stop my heels from slipping?
Yes, heel grips are one of the most effective solutions for stopping heel slip. They work by adding adhesive-backed cushioning or friction material to the inside of the boot's heel counter, reducing the gap between your heel and the boot. This increases grip and prevents your foot from sliding forward and up inside the boot. Most heel grips are affordable, easy to install yourself, and reusable or replaceable once they wear out. They work best when combined with proper lacing and the right sock thickness.
How do I know if my boots are the right size if they're still slipping?
Boot sizing involves both shoe size and leg proportions. Even if your shoe size is correct, slipping often means the heel counter is too loose, the calf or thigh is too wide, or there's excess volume in the shaft. Check that you have about a half-inch of space at your heel when standing, that your calf isn't bulging over the boot's edge, and that the boot's upper doesn't feel loose when you walk. If your measurements fall outside the boot's design range, consider stretchy boot sleeves or professional modifications rather than sizing up or down.
This article was written using GrandRanker
0 comments